There are two ways to re-size an embroidery design: inside your embroidery machine itself or in software on your computer. Below I’ll show you both methods and what to look out for when resizing your embroidery designs!
How to re-size an embroidery design on your machine
The directions may differ slightly depending on the make and model of your machine, but they should be similar. After you’ve selected a design and hit ‘set’ – you’ll be greeted with the edit screen.
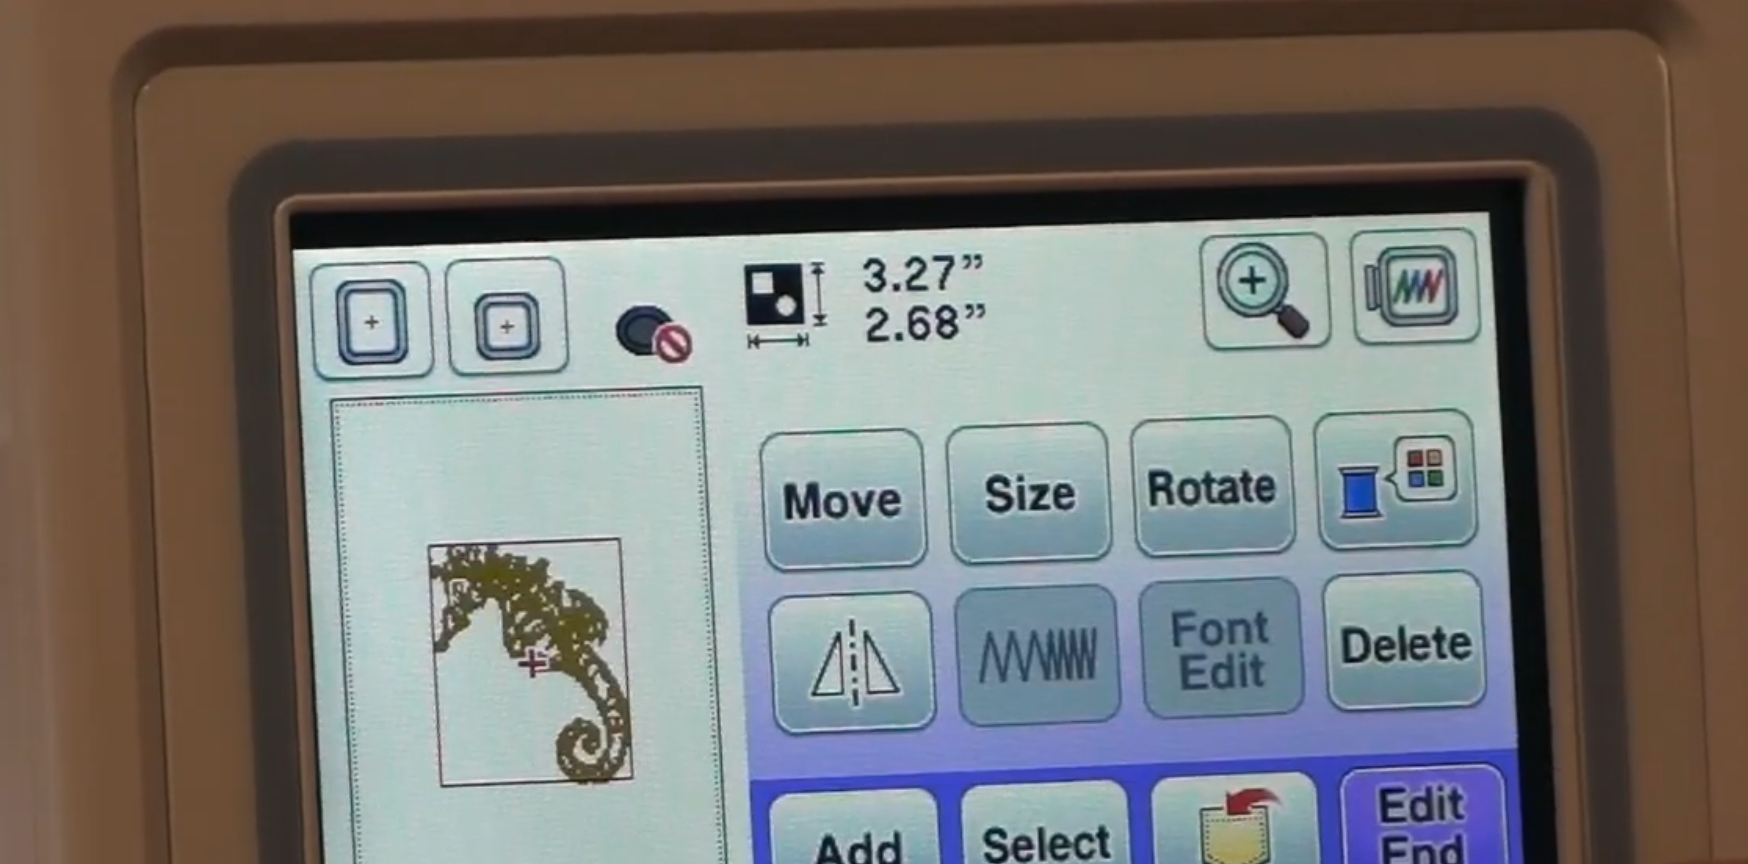
Tap the ‘size’ button, and you’ll see a screen similar to the one in the image below.
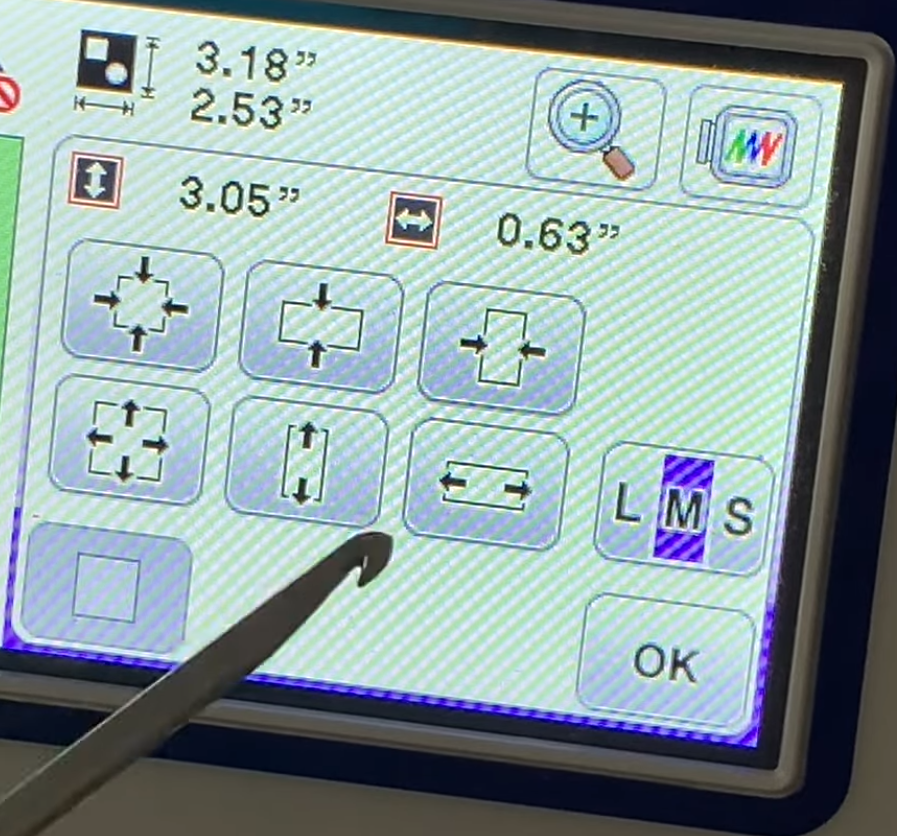
You can select “L” “M” or “S” on the right to pick small, medium, or large automatic sizing. Or, you can press and hold on the other icons to re-size to a more specific sizing.
Each one allows you to manipulate the design in a different way, and honestly, just playing with the buttons a bit is the best way to figure out what will work best for the design. Tap ‘ok’ when you’re done editing.
How to re-size an embroidery design on your computer
The second way to re-size your design is on your computer by using free embroidery software. You can also use this software to change embroidery file formats if your design is not in the correct format for your machine. For this tutorial, I’ll be using the free Wilcom TrueSizer embroidery software.
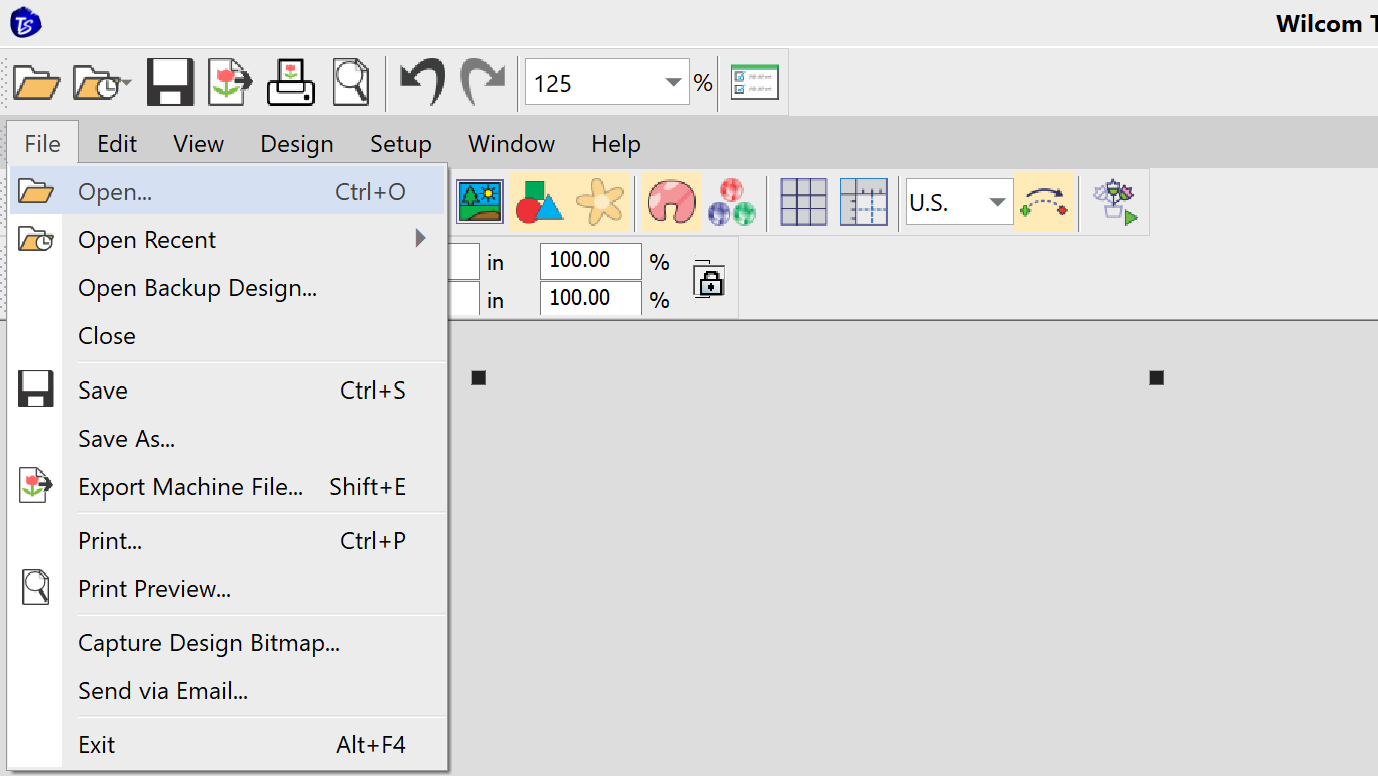
To get started, just open the software and click File in the top menu. Select Open and locate your embroidery design file. The program will load a preview and you’ll be ready to edit.
Re-size by dragging the nodules
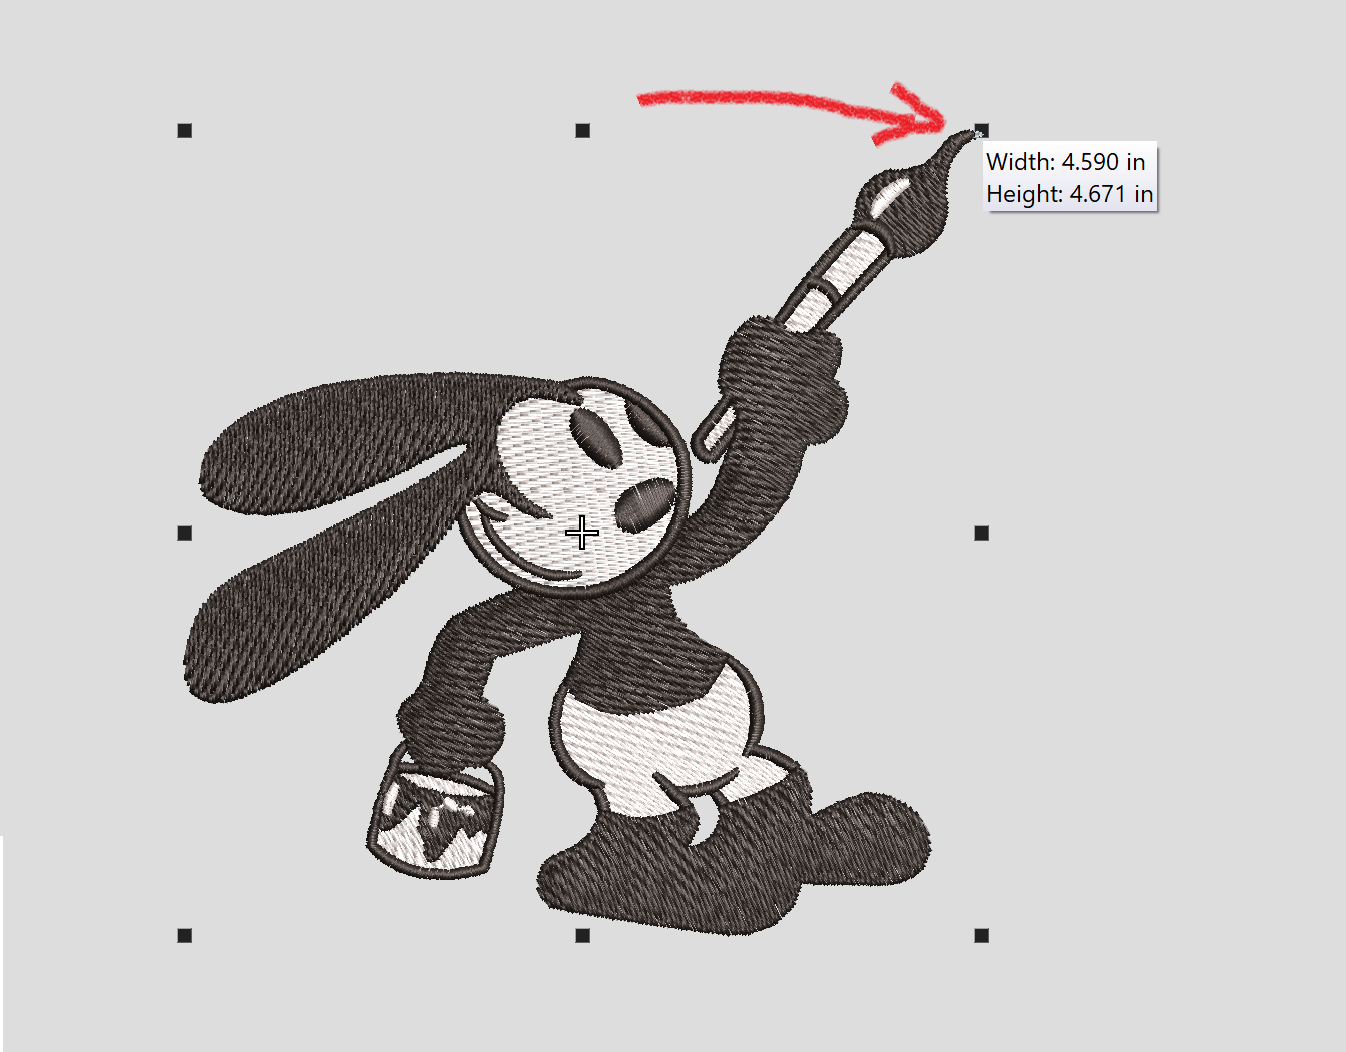
The first method of re-sizing in Wilcom TrueSizer is by dragging the design to the desired size. Click on the design preview and you’ll see your design is now surrounded by little black squares.
Left click and hold on one of these squares. Now, start dragging the design in any direction until you’ve achieved the size you want.
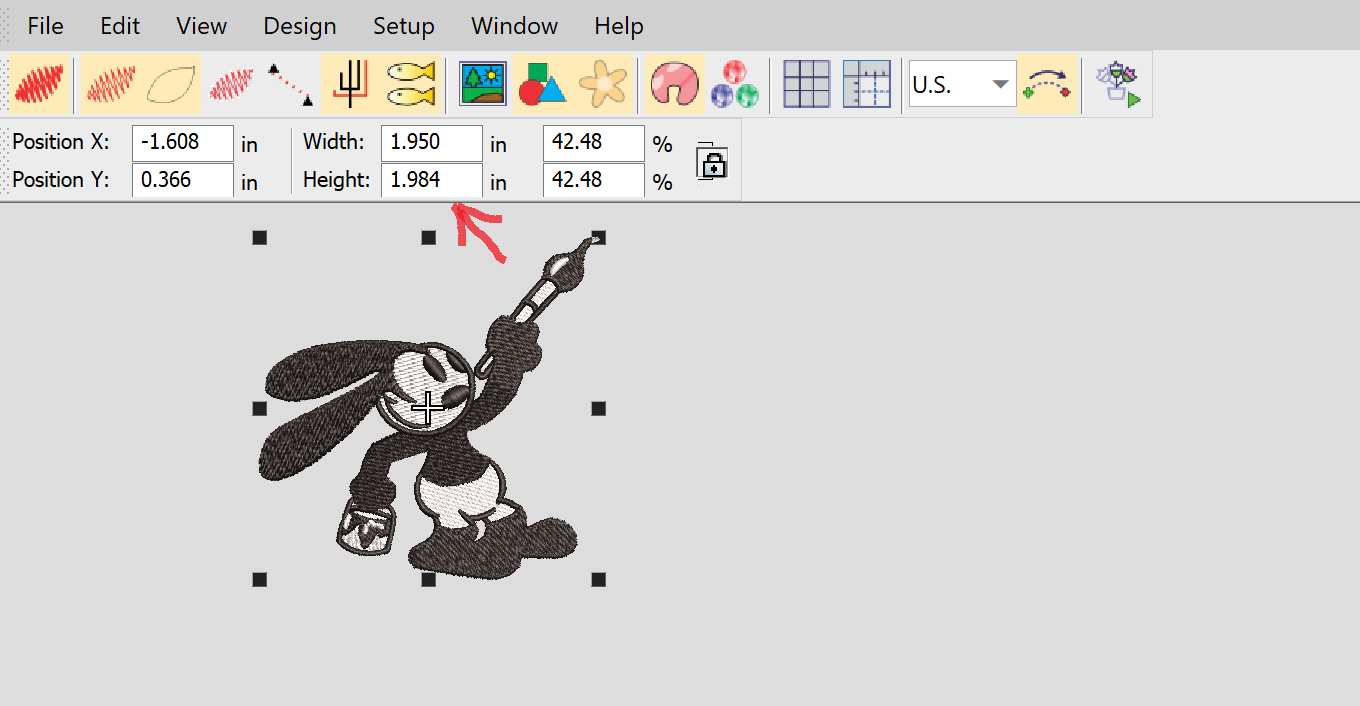
Type your preferred size in the toolbar
You can also use the tool bar in the top menu. Type in your desired size here and the program will re-size it. It will automatically populate the second dimension to maintain the design’s proportions for you.
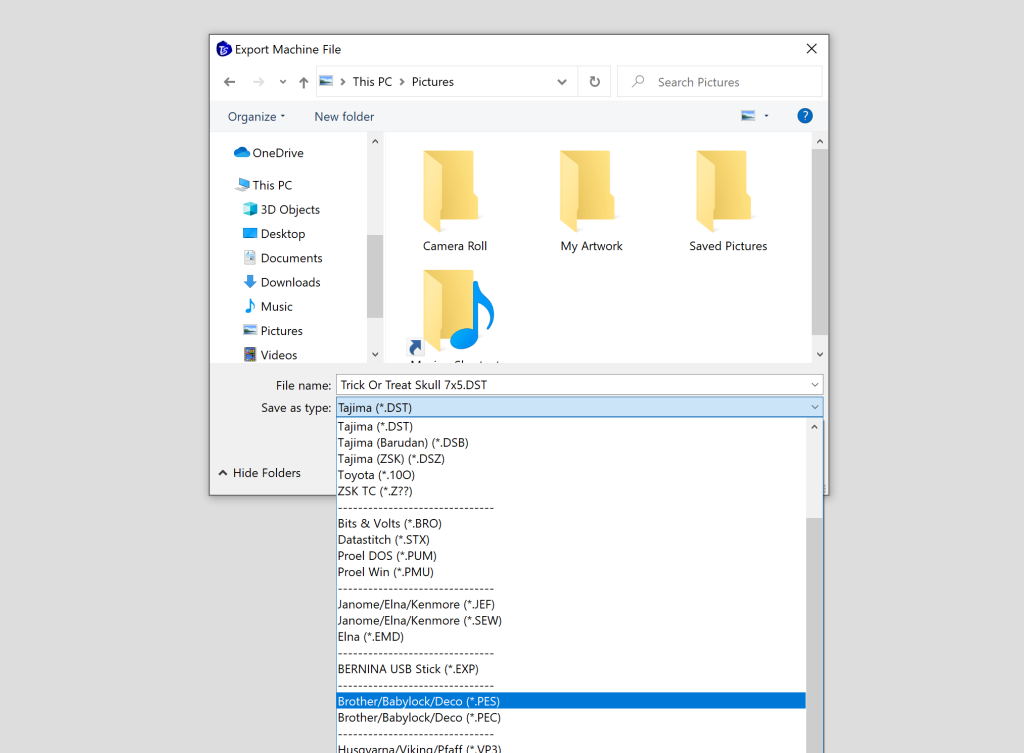
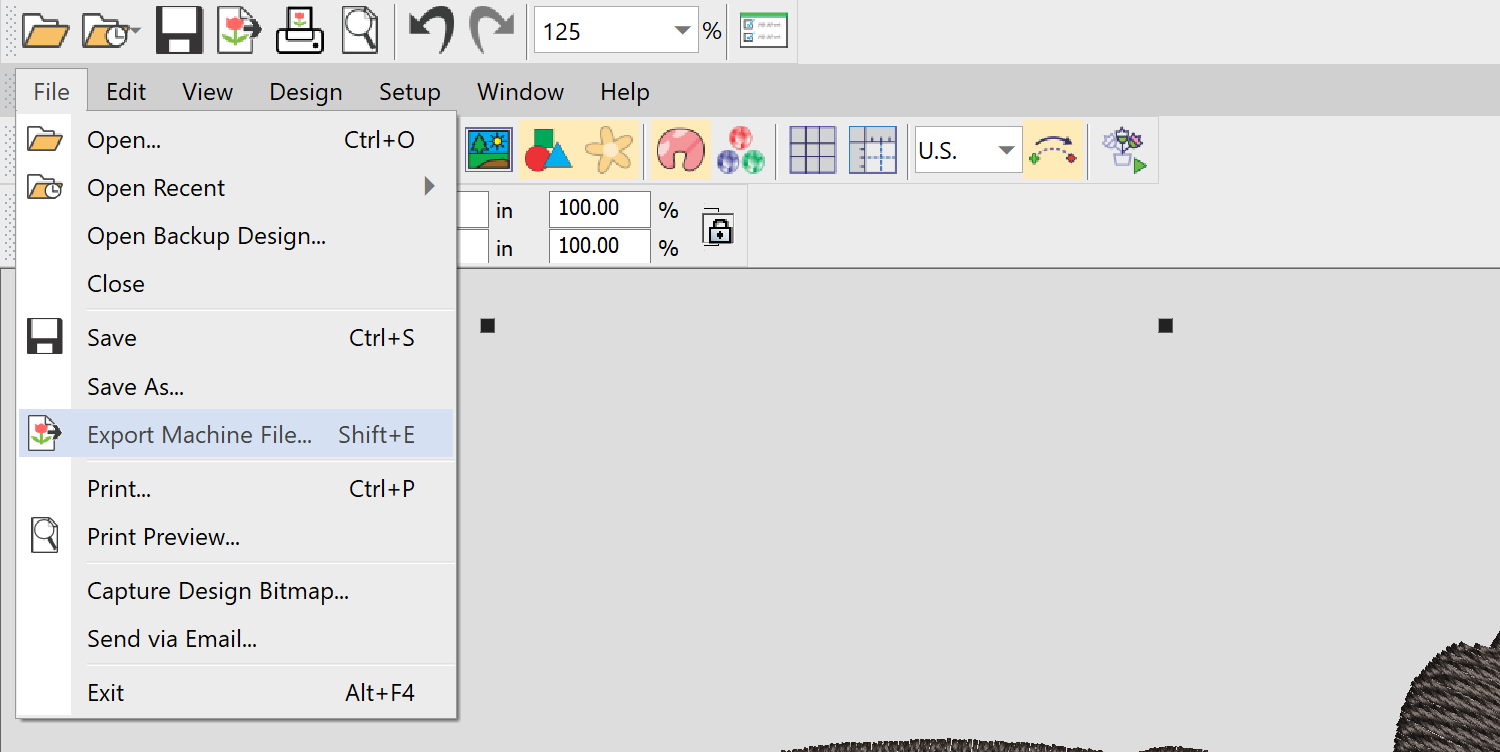
After you’ve gotten a size that you’re happy with, just export the file to your desired machine format. Click File > Export Machine File in the top menu and then select your desired file format when saving your design.
How much can you re-size an embroidery design?
In most cases, it’s “safe” to re-size a design about 20% in either direction. However, this can depend on the design itself, how it was digitized, what you’re using it for, etc.
Why can’t you re-size a design as much as you want?
This has to do with the way that embroidery machine files work. The file which you use in your machine does not contain the same information as when it was created. This is most evident with DST files, as they do not transfer any color information, but other embroidery design formats like PES and JEF are also lacking important information which is needed for re-sizing.
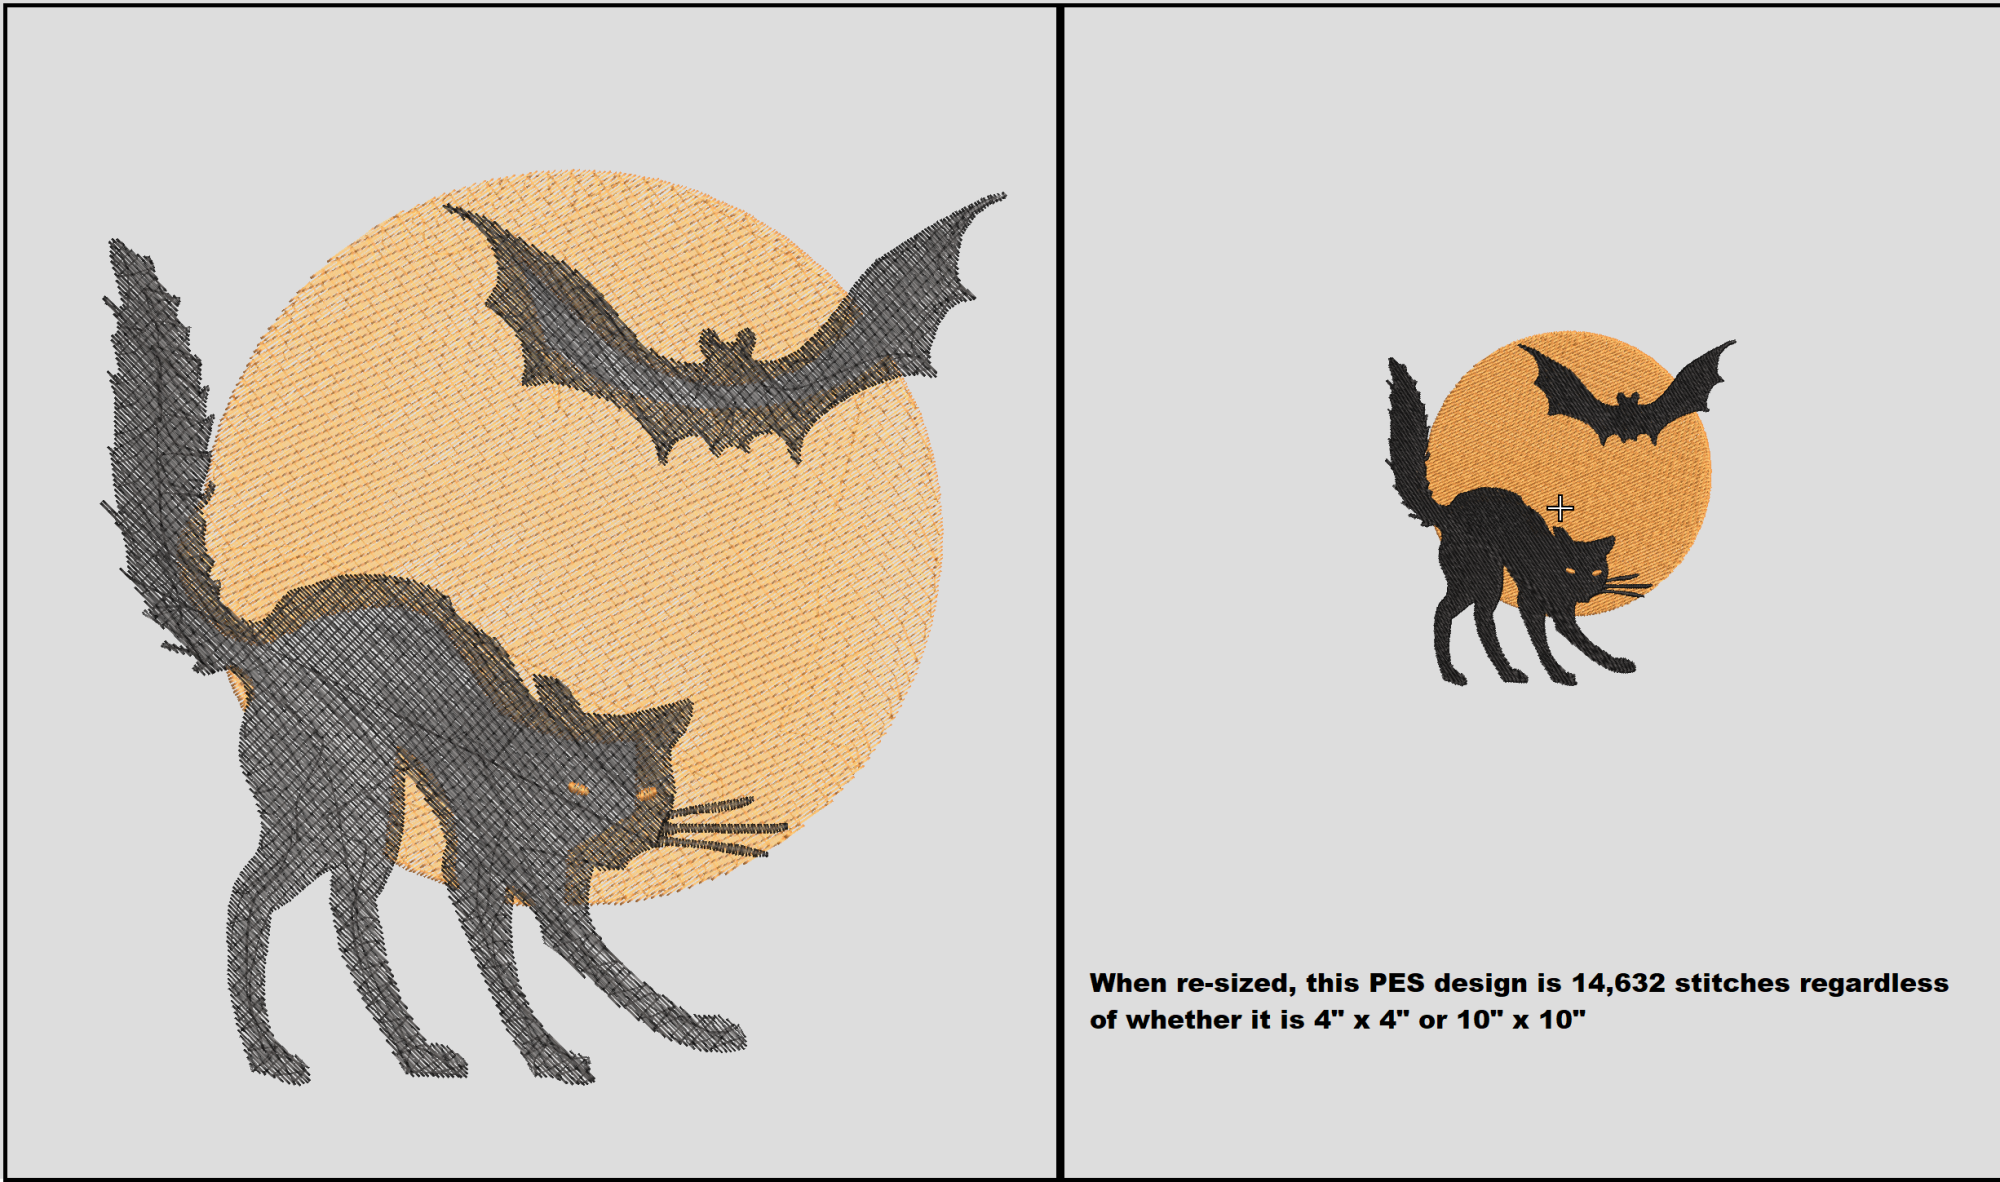
For starters, when you re-size a machine embroidery design like a PES or JEF file – it does not add or subtract embroidery stitches. You can see the consequences of this in the image below. This PES design was originally digitized at 4″ x 4″ and it will remain at 14,632 stitches no matter how much you re-size it, whether up or down.
Re-sizing designs which have intricate details or tiny text makes things even more difficult, and while it seems like re-sizing an embroidery design should be an easy task – it’s often more complicated than it seems.
However, if you have the native format, the one which is a master save of the digitization file, then your odds of re-sizing it are much better! That’s because these files hold a lot more information than a machine file.
Unfortunately, it’s unlikely that you will have these native formats unless you have digitized the design yourself or hired a pro to digitize the design for you. (Make sure to save these files yourself or request them from your digitizer!)
Re-sizing with native design formats
If you do have a native file format handy, like an EMB file used by Wilcom software – re-sizing will be a more pleasant experience. For example, I do have the EMB file for this black cat design.
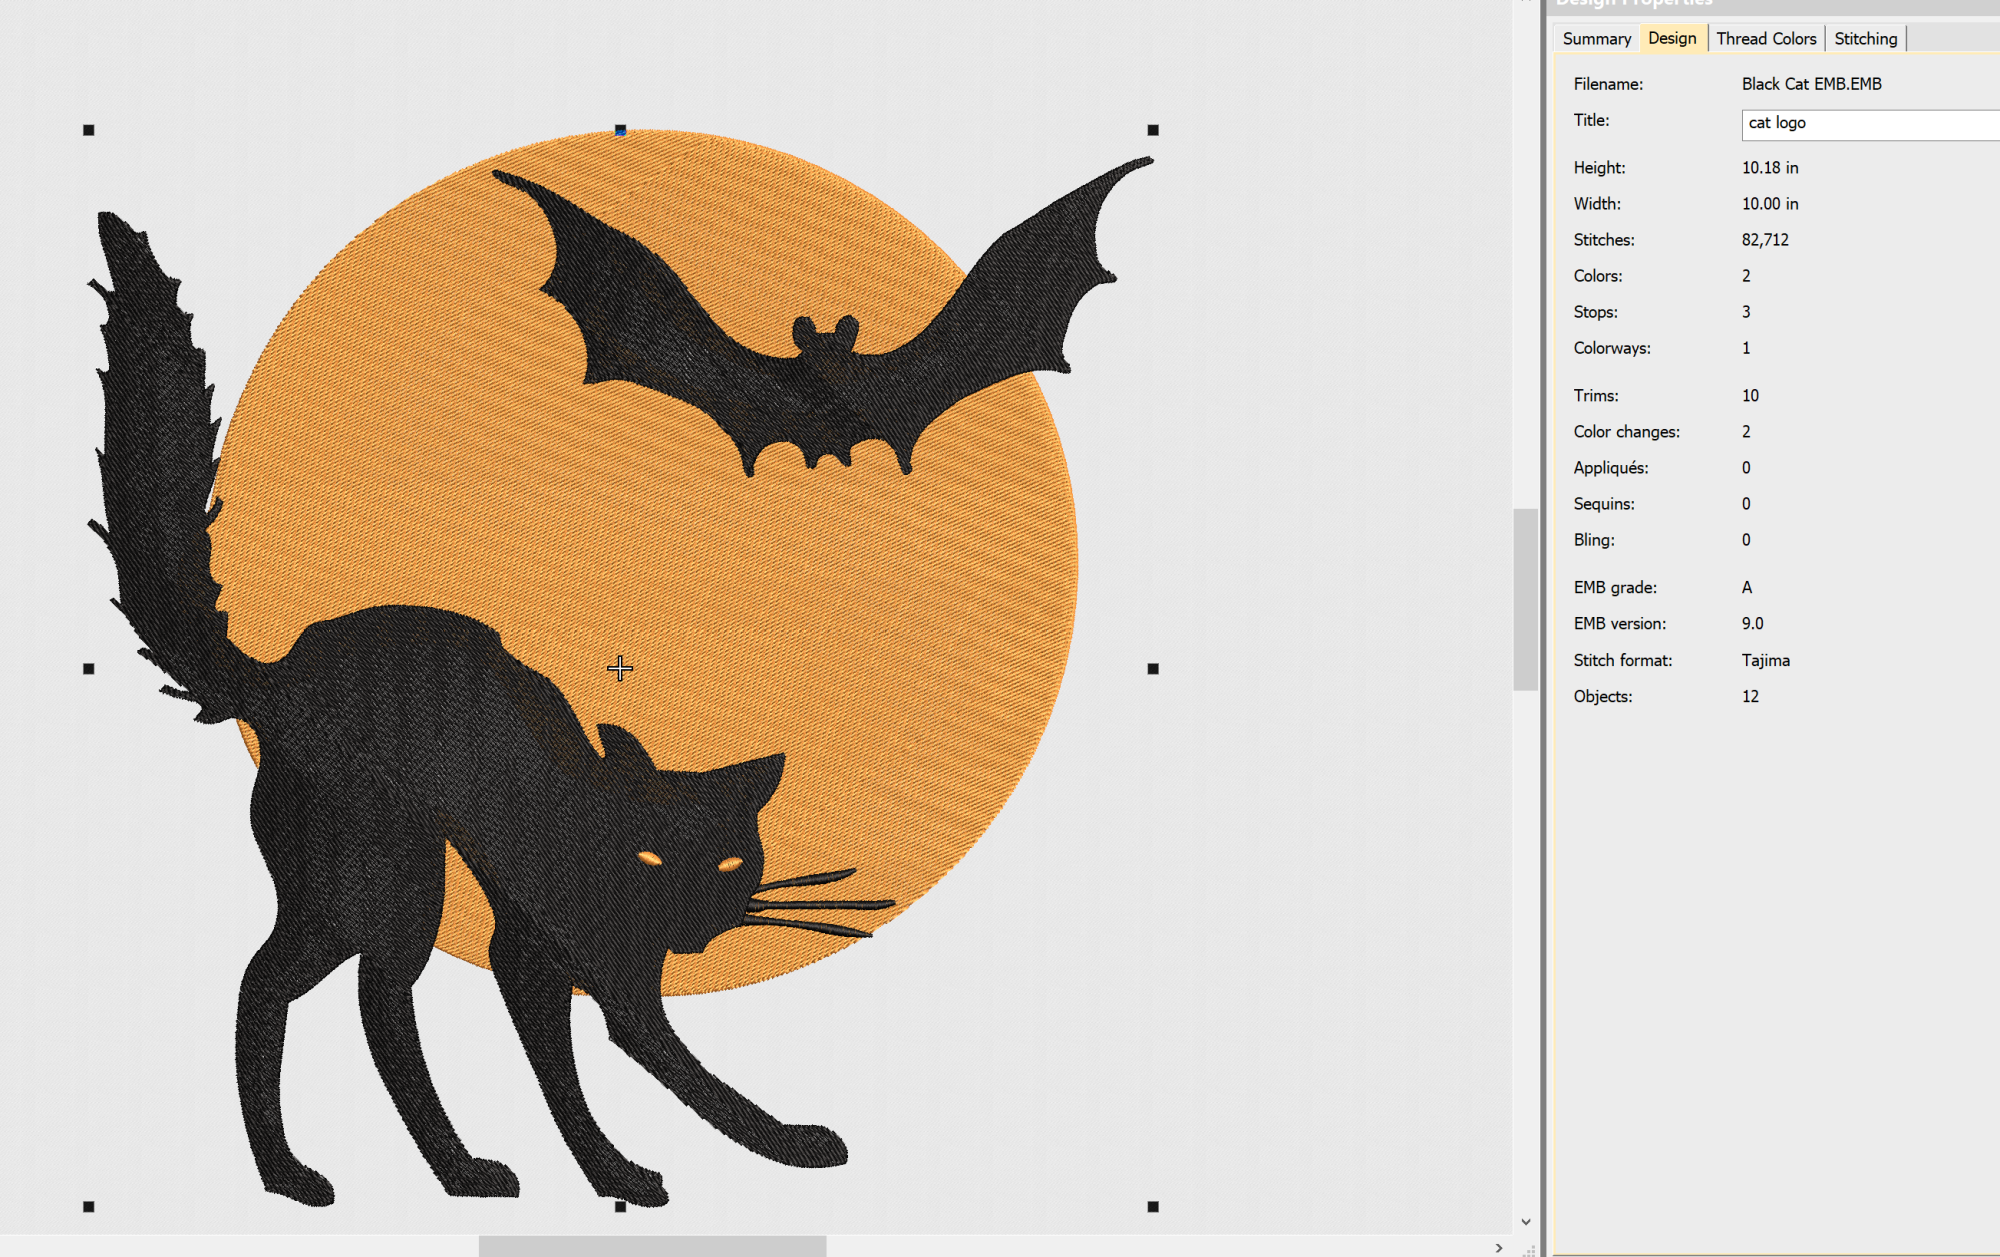
Since I am using Wilcom TrueSizer and their native EMB file format – the results look a lot nicer. I’ve re-sized this design to 10″ x 10″ and you can see the stitch count has been increased to 82,712 to compensate.
However, even if you have a native format to work with – you could still have limitations. This is especially true if you’re trying to make a design smaller. Why? Well, if the design has a lot of intricate details… it’s just hard to make those turn out right on a 4″ x 4″ design sometimes! So, keep this in your mind when choosing a design to digitize or re-size.
Can you change a machine file to a native file format?
Sorry, but no! You can’t convert a JEF or PES file to an EMB file, only the other way around. That’s why you should always save your native files when creating a design or ask for them from your digitizer if you pay someone to make the design for you. Having this master file will give you a lot more options.

Barb, our resident quilter and embroidery aficionado, weaves a thread of creativity through our collection. Serving as the curator of machine embroidery content, Barb infuses each design with a touch of her artistic expertise. The free embroidery patterns you discover on our site often bear the mark of Barb’s craftsmanship. Let’s get crafting!